Showing posts with label printable. Show all posts

March 09, 2026

Handmade Birthday Craft Ideas: Cake Toppers, Chip Bags, and Cards

Celebrating birthdays becomes even more special when you add a personal, handmade touch. I love creating small craft projects for family and friends because they make each celebration feel more thoughtful and unique. Recently, I worked on a few birthday-themed craft projects that were fun to make and perfect for gifting.
 
Here are some of the birthday crafts I created.
 
Birthday Cake Topper – 21st Birthday

For my nephew’s 21st birthday, I decided to make a custom cake topper. A handmade topper adds a special touch to any birthday cake and makes the celebration feel more personalized.


This design is from Cricut Design Space.  It was simple but elegant, and it made the cake look extra festive. Projects like this are quick to make but can make a big impact on the party table.
 
Birthday Chip Bag
 
Another fun project I made was a birthday chip bag for my friend. Custom chip bags are great for party favors, snack tables, or even small gifts, and they’re surprisingly easy to create.

 
For this design, I used my favorite Bear Birthday Party Clipart, which gave the chip bag a cute and playful look. Personalized snack packaging is always a fun addition to any birthday celebration.
 
Bee Birthday Card
 
I also created a bee-themed birthday card. I originally found the design in Cricut Design Space and edited the file so I could turn it into a greeting card.


The bee design was cheerful and perfect for a birthday greeting. Sometimes, a small edit to an existing design can turn it into something completely new and useful.
 
Happy Birthday Pop-Up Box Card
 
One of my favorite projects was a Happy Birthday pop-up box card. This design also came from Cricut Design Space.

 
I made this card for my mom because she loves flowers. The pop-up design makes the card extra special because it opens into a beautiful display instead of a traditional flat card. It’s a wonderful keepsake that can be displayed long after the birthday celebration.
 
Final Thoughts
 
Handmade birthday crafts are a great way to show people you care. Whether it’s a cake topper, a customized chip bag, or a unique pop-up card, these small projects can make birthdays even more memorable.
 
I always enjoy experimenting with different designs and personalizing each project depending on who I’m making it for. Crafting for birthdays is not only fun but also a meaningful way to celebrate the special people in our lives.

February 06, 2026

Chinese New Year Cupcake Topper

I created a festive Chinese New Year cupcake topper featuring a traditional Chinese man and woman, along with the 2026 Year of the Horse. This project is simple, beginner-friendly, and perfect for adding a handmade touch to CNY treats.
 
Materials and Tools:
 
Cricut Maker 3
Printer
Glossy photo paper
Lollipop sticks
Foam tape
Tape
 
Step 1: Prepare the Images
 
In Cricut Design Space, start by setting up your images:
 
Chinese man and woman:
Duplicate each image, then flip one copy horizontally so the two images will be back to back.
 
2026 Horse image:
Simply duplicate the image; no flipping needed.
 
This ensures the topper looks finished and neat from both the front and back.
 
Step 2: Print and Cut
 
Print the images on glossy photo paper using your printer.
Load the printed sheet into your Cricut Maker 3 and cut the images using the Print Then Cut feature.


Step 3: Assemble the Cupcake Topper
 
Take one image and tape the lollipop stick to the center of the back.
Add foam tape over the stick and around the image to create dimension.
Align and place the duplicated image on top, sealing everything together back to back.
Repeat the same steps for the 2026 Horse topper.


Final Touch
 
Once assembled, insert the topper into a cupcake for an instant Chinese New Year–themed decoration.
 
This project is a fun way to combine paper crafting with festive celebrations, and it’s my entry for Bee Happy Weeklies Week 6.

January 22, 2026

Crafting My First Handmade Notebook (And Finally Using My Mini Cinch)

One of my quiet goals this year is to finally use the craft supplies and tools I already own. If you’re a crafter, you probably know the feeling: buying tools with big dreams, then tucking them away while waiting for the “perfect” project or moment.
 
Four years ago, I purchased a Mini Cinch Bundle because I wanted to make my own notebook. At the time, I talked myself out of it. I already had so many unused notebooks at home, so making another one felt unnecessary. And just like that, the Mini Cinch stayed boxed up… for years.


Fast forward to today, and honestly, I still have plenty of notebooks. What’s changed is my mindset. Instead of waiting for the right reason or the right time, I realized that using what I already have is reason enough.
 
For Bee Happy Weeklies – Week 4: Craft a Notebook, I finally gave myself permission to try. Since I love planning, especially for travel, I decided to create my own travel planner. I used a Travel Planner I downloaded from Design Bundles Plus, which can be easily customized using Canva.
 
 
I kept this project simple by using tools and materials I already owned:
 
Paper
Laminating sheets
Printer
We R Makers Guillotine
We R Maker Minc
We R Makers Mini Cinch
 
How I Made My Notebook
 
Step 1: Downloaded the planner and resized it to my preferred notebook size.
Step 2: Printed all the pages and manually cut them using my guillotine.
Step 3: Laminated the cover using the Minc.
Step 4: Punched the holes and bound everything together with the Mini Cinch.
 
Since this was my first time making a notebook, the process took longer than I expected. There were moments of uncertainty, small mistakes, and plenty of learning along the way. But when I finally finished, I felt a sense of accomplishment that went far beyond the finished notebook. The process itself reminded me why I love crafting in the first place.

 
This experience encouraged me to stop saving my tools for “someday” and to start exploring them now, even if I’m not an expert, even if it takes time. Crafting doesn’t need to be perfect or productive to be meaningful. It’s meant to be enjoyed, experimented with, and lived in the moment.


This won’t be my last handmade notebook. More importantly, it won’t be the last time I choose to use what I already have instead of waiting. Sometimes, the most creative thing we can do is simply begin.

September 12, 2025

Grandpa and Grandma Sticker Set

Grandparents’ Day is coming up, so I designed a custom Grandpa and Grandma Sticker Set using my Cricut Maker 3 and glossy sticker sheet. 

I used the Dementia Clipart from Design Bundle Plus Exclusive Products. The set features a mix of grandfather, grandmother, medicine, apple, and a scene of their daily routine. 


I made this fun little sticker to remind our awesome lolo and lola to take their meds, vitamins, get moving, and stay healthy every day! A little reminder goes a long way! 


These stickers are ideal for journaling, scrapbooking, planner decoration, nursing home projects, etc. Staying healthy can be fun too, especially with stickers!

October 17, 2023

Halloween Chip Bag Treats

Halloween is near so before I forget I will start sharing my Halloween Craft Projects that I’ve been doing since September. If you remember my “Halloween Lollipop Holder” post, I mentioned that my son needs packaging for their project in Entrepreneurship Class. So aside from the lollipop holders, we also made this Halloween Chip Bag Treats. 


Our initial plan is to buy a “stand-up zip lock pouch” and we will just add stickers but the problem is “shipping”, baka hindi madeliver agad yung pouch so I suggested Chip Bag treats. I’ve been meaning to try this project but I don’t have a thin photo paper but we still pushed the project kahit sticker lang ginamit namin. 


My son knew how to use Photoshop so I purchased a Chip Bag Template so it would be easy for us to do the project, we would just drag and drop the graphic elements using the PSD file. Also, if the teacher asked how he made the packaging, madali magpresent. For designs, we used some designs from these bundles; Retro Halloween Sublimation Bundle and Coffee Halloween Sublimation Bundle.


After printing, I taught him how to assemble the chip bag and pack his candies. These are the samples but he needs to finish everything in school. Just like his lollipop holders, sold out din ito. I’m planning to do this project in the future so I already bought photo paper. :)


August 04, 2022

Back to School: Start of Blended Learning

We only have few days left to savor our summer vacation because, on Monday, it is our first day of school. Two years of Online Distance Learning are over and now we are on Blended Learning, a combination of face-to-face and online classes. 

I’m not yet ready because… 

1. We’re still contemplating if my son will avail of school service or not because we were surprised by the price increase. We are aware of the fuel increase but an additional PHP2000 to the previous rate is too much for me. Since it is Blended Learning, my son will only go to school twice a week so I think PHP4900 is expensive. We asked for a discount rate since it is not 5 days a week pero hindi pa kami binalikan ng old school service niya. 

We already contacted a new school service that gave us a discounted rate but we haven’t confirmed my son’s slot yet. We are still giving a chance to the old school service kasi naman since Kinder, yun ang service niya. 

2. We don’t have a list of school supplies yet so I am still waiting for Orientation Day. 

3. Dahil two years na online classes, walang shoes anak ko. Nakauniform lang siya pero hindi na kita ang paa so no need na bumili. Hehehe! So after two school years, ngayon lang ulit kami bibili. We went to the mall a few weeks ago pero rubber shoes lang nabili namin but for black shoes, walang available sizes sa gusto namin na style. Good thing P.E. Uniform daw sa first day ng onsite class so we still have time to buy shoes. 

My son had his COVID19 Booster shot last month but honestly, I’m still nervous about their face-to-face class even though it is only two days a week. But I have no choice but to accept, hindi naman forever ang online classes, students need to go back to their normal routine din, just like in other countries. 

Anyway, I made this “First Day of Grade 8” school banner for my son and you can download the banner here if you want. 

July 22, 2022

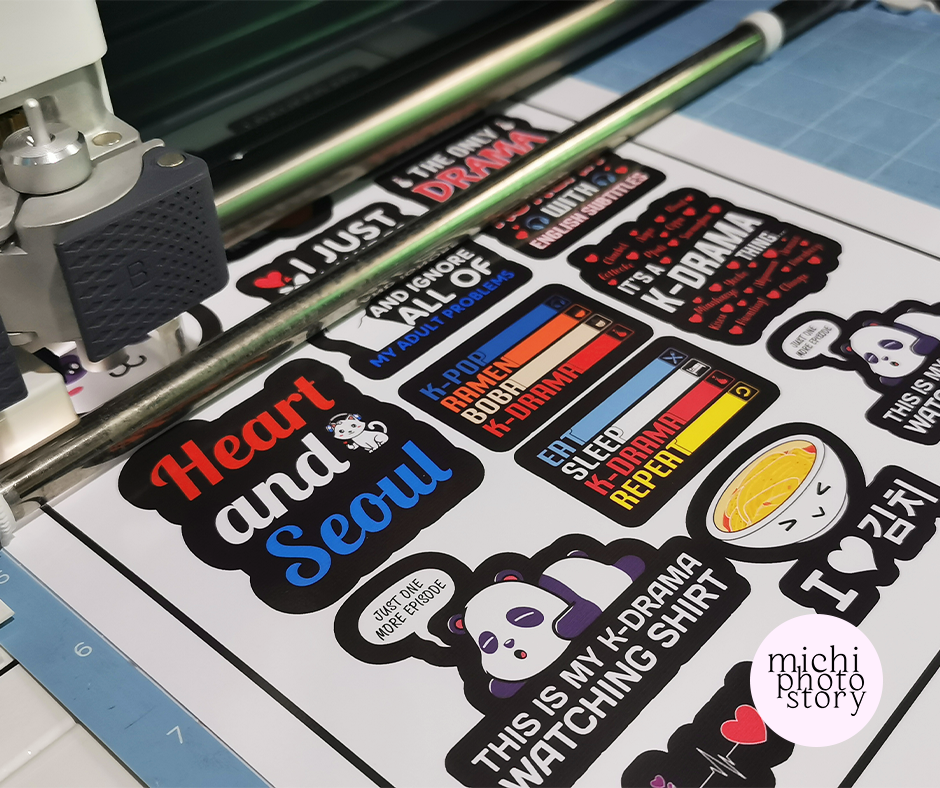
DIY Korean Drama Stickers

When the community quarantine started, I rarely watched television because we subscribed to Netflix already and nawala na rin kasi yung ABS-CBN. Parang naging display na nga lang yung TV namin kasi bihira mabuksan except for our play or movie time. 

Since I can watch series, movies, and shows anytime and anywhere using my phone. I became more hooked to Korean drama series, mukhang nadoble pa yung number of dramas na napapanood ko every year. You can check my Korean Drama List here and Short Korean Drama List here.  

Korean Drama became part of my life because it is one of my relaxations so when I saw this K-Culture Bundle, I immediately bought it so I can make my own Korean Drama stuff. The bundle has graphics for Korean drama and K-Pop fans. 


I’m not into K-Pop so I only made Korean Drama Stickers. I uploaded the SVG files on Cricut Design Space, used the offset feature, resized the image, attached, printed, and cut. That’s it! 

Just one more episode 
I Purple You Korean Hand Symbol 
Heart and Seoul 
Eat, Sleep, Kdrama, Repeat 
KPop Finger Heart Hand Symbol Heartbeat 
It’s a K-Drama Thing 
I just want to watch k-drama and ignore all of my adult problems. 
I paused my K-drama to be here. 
I was up all night watching Kdramas 
The only drama I want is Korean with English Subtitles


January 06, 2022

Printable Learning to Trace Activity for Kids

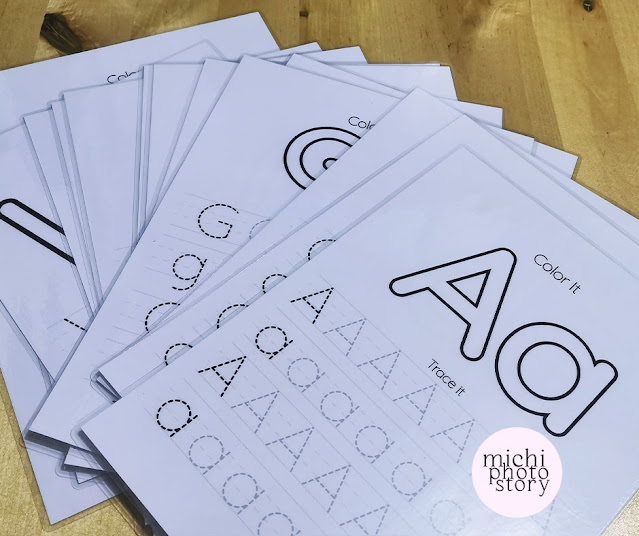
Giving gifts to toddlers is easy because there are so many options out there, you can buy toys, books, and clothes. But because of the COVID19 virus, I am hesitant to go to the mall just to buy gifts so the majority of my gifts last Christmas were DIY. Three months ago, I prepared Alphabet Dot Marker for my godson’s birthday so last month, I prepared this Learning to Trace activity for my husband’s nephew. 


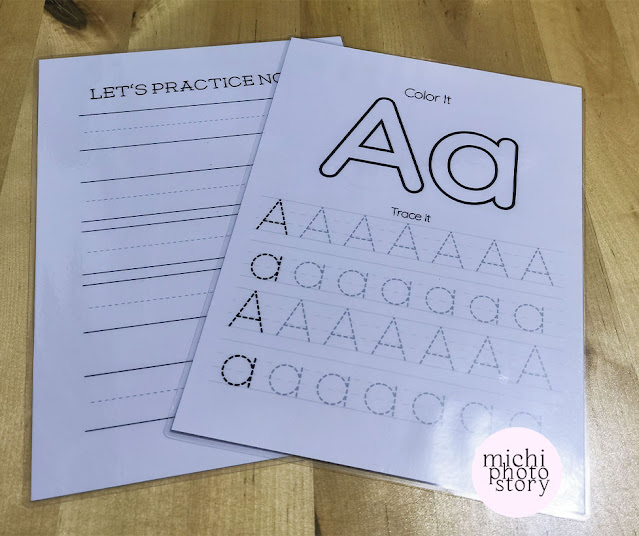
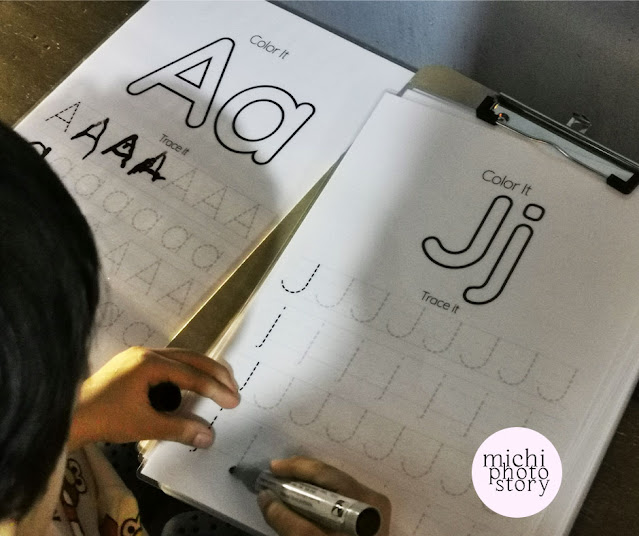
To make my life easy, I just purchased this Printable Learning to Trace Activity. This is a digital file that includes AI, PDF, and PNG files. This activity is good for 3 years old and above, toddlers, Preschool, and even Kindergarten kids. Children will learn how to trace lines, shapes, and even the alphabet. The file is ready to print already so I did not change anything. I just print and laminate everything. 


I remember when my son was in toddler years, I bought a lot of tracing activity books so I like this laminated version because it is not a one-time-use. Just use whiteboard markers and wipe after using. This is a nice activity especially now that most of the kids are stuck at home because of the COVID19 restrictions.  

* This post contains affiliate links.

December 18, 2021

Confirmation

Seven days to go and it’s already Christmas and I still don’t have holiday plans. Waah! But I don’t want to stress about it so I will just take one day at a time. So for now, let me lessen my endless backlogs. 

Four years ago my son had his First Communion and just a week ago, he already had his Confirmation. If there is no community quarantine, my son will have his Confirmation last year because this is part of their event in their school. But there is no news about it so when my friend informed me that there is Confirmation here in our place, I immediately informed my husband about it so he can register my son.

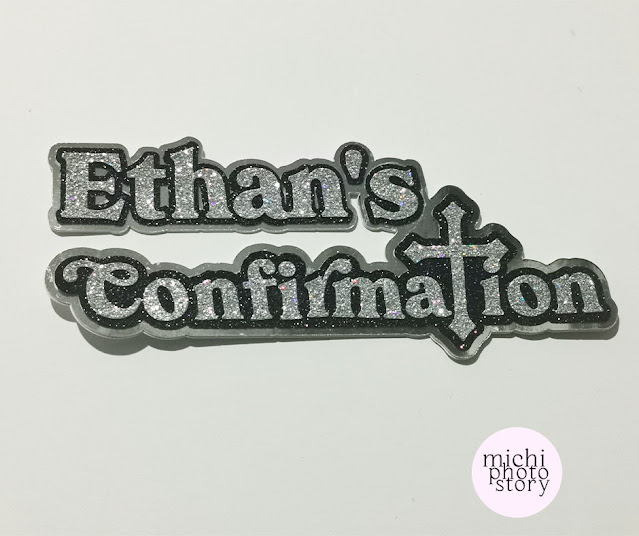
Even though I don’t fully understand the Sacrament of Confirmation, I know that it is a special event for my son so I still prepare something for this event. First is the Confirmation Cake Topper, this is just a layer of glitter and metallic cardstock. Unfortunately, I wasn’t able to use this cake topper because my son doesn’t want a cake. He prefers to eat leche flan and the topper is too big for the flan. Anyway, it is still a souvenir that I will keep. 


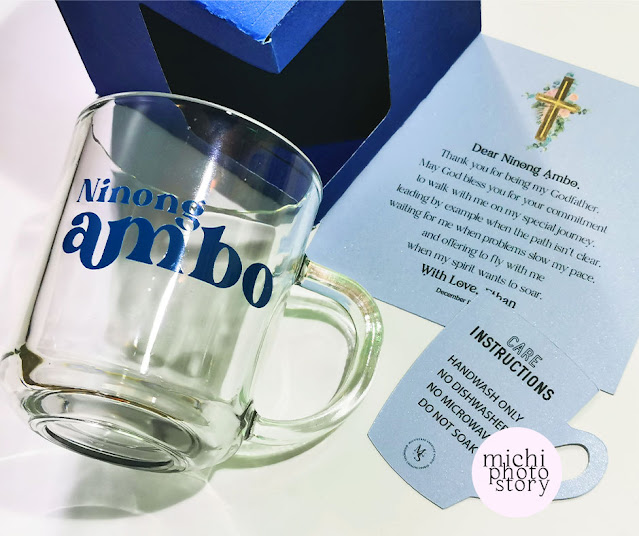
And because of the COVID19 scare, only one parent and godparent are allowed to attend the Confirmation so I was not able to witness my son’s Confirmation but in spirit, I am there. Since there is only one godparent, I DIY the Confirmation Souvenir


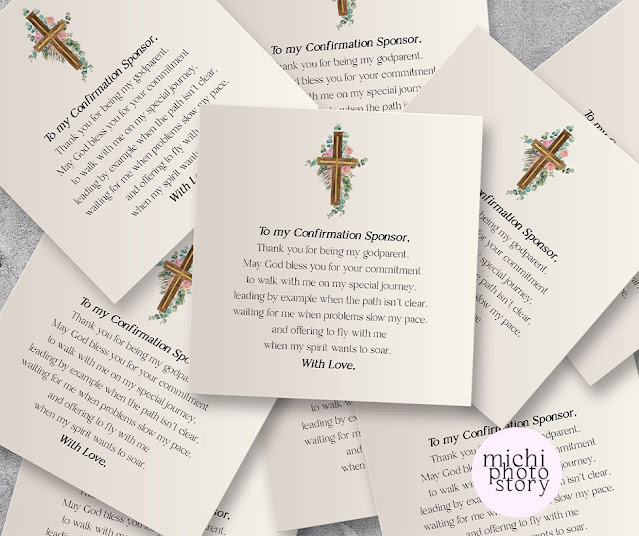
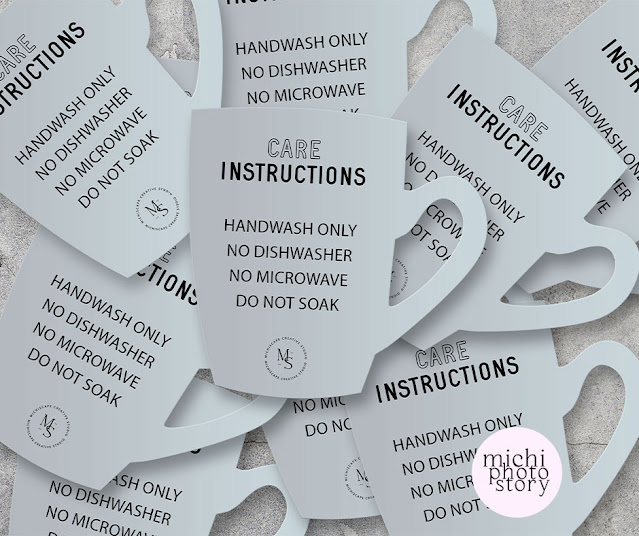
I just personalized this mug using Teckwrap color-changing vinyl (hot) and designed a Care Card Instruction and Confirmation Gift Tag. I found the message on Pinterest and I just recreated it. I edited this file so just in case you need a souvenir tag, feel free to download it here. (size is 3x3 inches). 

"To my Confirmation Sponsor,

Thank you for being my godparent. May God bless you for your commitment to walk with me on my special journey, leading by example when the path isn't clear, waiting for me when problems slow my pace and offering to fly with me when my spirit wants to soar. 

With love,"


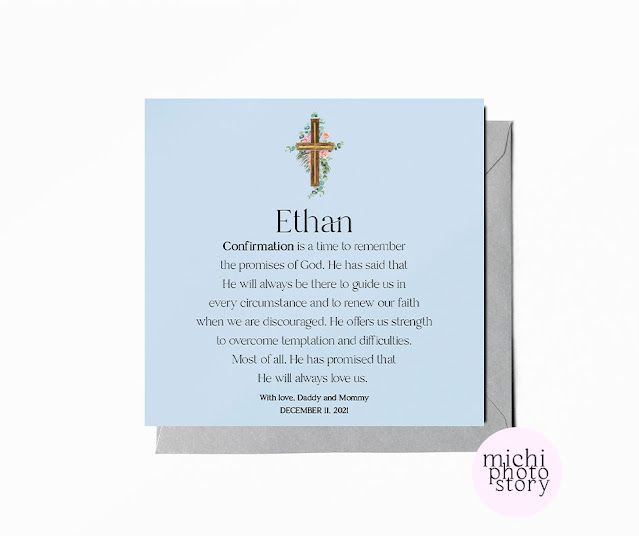
I also make a card for my son, (the message is from Pinterest too). I did not buy a gift because I am taking a break from online shopping. I dislike delay delivery during Christmas Season so I just bought a gift at the mall after our celebration. 


"Confirmation is a time to remember the promises of God. He has said that He will always be there to guide us in every circumstance and to renew our faith when we are discouraged. He offers us the strength to overcome temptation and difficulties. Most of all. He has promised that He will always love us."


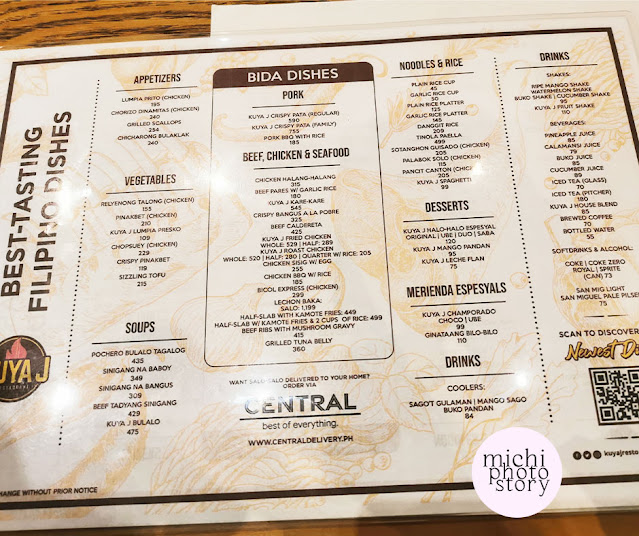
After the Confirmation, my husband fetched me and we had lunch at Kuya J. I have a gift voucher that I want to use so we ate here. It’s been a long time since we at Kuya J and I was surprised when I saw their menu because the food that I used to order, was no longer there. My husband ordered Crispy Pata PHP590, Pinakbet PHP210, Rice Platter PHP125, Iced Tea Pitcher PHP180, Leche Flan PHP75, and Kuya J Halo-Halo Espesyal (Original and Ube) PHP120.


November 18, 2021

Printable Alphabet Dot Marker

Slowly, the Philippines is starting to lessen the community quarantine restriction so it seems that everything will be back to normal soon. But even though I’m fully vaccinated, I still try my best not to go out unless it is necessary. I am still not brave to explore the malls just to look for gifts for birthdays, anniversaries, or even this coming Christmas season. Thanks to online shopping, I can buy gifts even from the comfort of our home. 

If I don’t know what to buy, I create my own gift just like this Printable Alphabet Dot Marker that I prepared for my godson’s birthday. When my son was still in toddler years, I want him to do this dot marker activity but my problem is I don’t know where to buy the dot markers. But after I tried Shopee, Lazada, and Amazon last year (late bloomer) everything changed so now if I need something I just search and browse these e-commerce sites. 


For your information, there are so many benefits of dot marker activity like 

1. It improves the child’s fine motor skills, hand dexterity, and grip. 
2. It develops the child’s hand and eye coordination. 
3. It enhances color recognition. 
4. It encourages creativity and exploration. 

Since I was not able to do this with my son, I decided to make one for my godson. I purchased the Printable Alphabet Dot Marker here. The printable file includes Ai Source File, PDF file (ready to print), and PNG images. There are two pages that have typo errors so I contacted customer service about it so they can update the files. But I don’t have time to wait so I just corrected the two pages, added background colors, and personalized the pages. 


I printed the pages on 90GSM paper and trimmed them so they would fit my A4 laminating film. Lastly, laminated the pages so it won’t be a one-time use activity. You can buy more dot markers so there are more colors but unfortunately when I bought the dot markers, limited colors lang. Ayaw ko naman ng dark colors. Anyway, this activity is flexible, aside from dot markers, you can use stickers, pompom balls, or any stuff that will improve the fine motor skills of your child. 

Sharing the links where to buy the

* This post contains affiliate links.

October 07, 2021

DIY Gamer Birthday Party Theme

Thirteen is a huge milestone for everyone, it is a transition from tween to teen. So even there is a COVID19 restriction, it did not stop us from celebrating this once-in-a-lifetime moment. My son suggested having a “Gamer” birthday party theme, I initially planned to invite his cousins so they can play video games but for everyone's safety, I did not pursue it anymore. But I still prepare a Gamer Birthday Party to document that my son is now officially a teenager. 


As I mentioned in my previous post, I will share the preparations that I did for this simple party. It took me a week to prepare for the party materials because I don’t want to feel overwhelmed so I spent few hours a day finishing a project. My first project is a birthday card, I designed this “Birthday boy, it’s time to level up”, card. It is a folded card that I just printed, cut, and folded, I print 3 pieces of this card for my husband, mom, and of course for me. This is available in my shop if you need a birthday card for your gamer family or friends.


The next project is "Ethan is now a teen birthday cake topper", it took me a long time to decide what materials will I use, either vinyl stickers + acrylic or cardstock. After contemplating, I settled for cardstock; I used glitter cardstock, metallic cardstock, and plain cardstock. I’m happy with the result because this is a big improvement compared to the cake topper that I did last year. 


Then for my third project is a cupcake topper or food topper. I designed this using the Game Kids Clipart Set. I printed this using cardstock and sticker paper. I used lollipop sticks for my cupcake or food topper.


Ethan is now a teen 
I paused my game just to be here 
Officially a Quaranteen 
You’ve already lived 1000 lives 
Level 13 unlocked 
I don’t age, I just level up 
Birthday boy, it’s time to level up 

The fourth project is the gift tag, “Happy birthday! You’ve already lived 1000 lives”. Just like the birthday card, it is a folded card that I printed, cut, and folded. 


The fifth project is the 13 banner, I started making my 3D numbers but after few hours of making it, I was not happy with the result so I ended up with this. I printed some graphics to add some designs so it won’t look so plain.


The sixth project is the Birthday Party Hat, I just searched for a free party hat template on Pinterest and uploaded it to Cricut Design Space. I used cardstock for this and added the remaining food toppers that I made. For a family of three, I prepare 3 party hats. 


The last project is souvenir stickers, “Game Over, thank you for coming”. I used sticker paper for this. We did not have visitors but I prepare simple food packs that my husband delivered to my in-laws. 


If you are planning for a gamer birthday party, feel free to download these souvenir stickers here


For regular glossy stickers, I’m using this or this
For cardstock, I'm using this

Just like that my baby boy is now a teen, it happened so fast and in a blink of an eye, my son’s face, body, and voice changed. And because we are stuck at home since the community quarantine started, I barely noticed the changes, unless makita ko yung old photos and videos niya na ang layo na pala ng face and voice niya sa dati. All I knew is tumatangkad siya. 


* This post contains affiliate links.
Klook.com